Factory and road-paint layouts
Factory and road-paint layouts
Build a factory that reads as a connected works: a tall hall, a useful loading apron, clear pedestrian access and an office wing. These are actual Hytale 0.7.5 screenshots of a creative build made with the expanded development kit. They are examples to build toward, rather than a downloadable prefab or a naturally generated ruin.
Choose a download whose requirements include your game patch, and read its notes for included blocks and markings. These screenshots show the expanded kit.
Engineering works
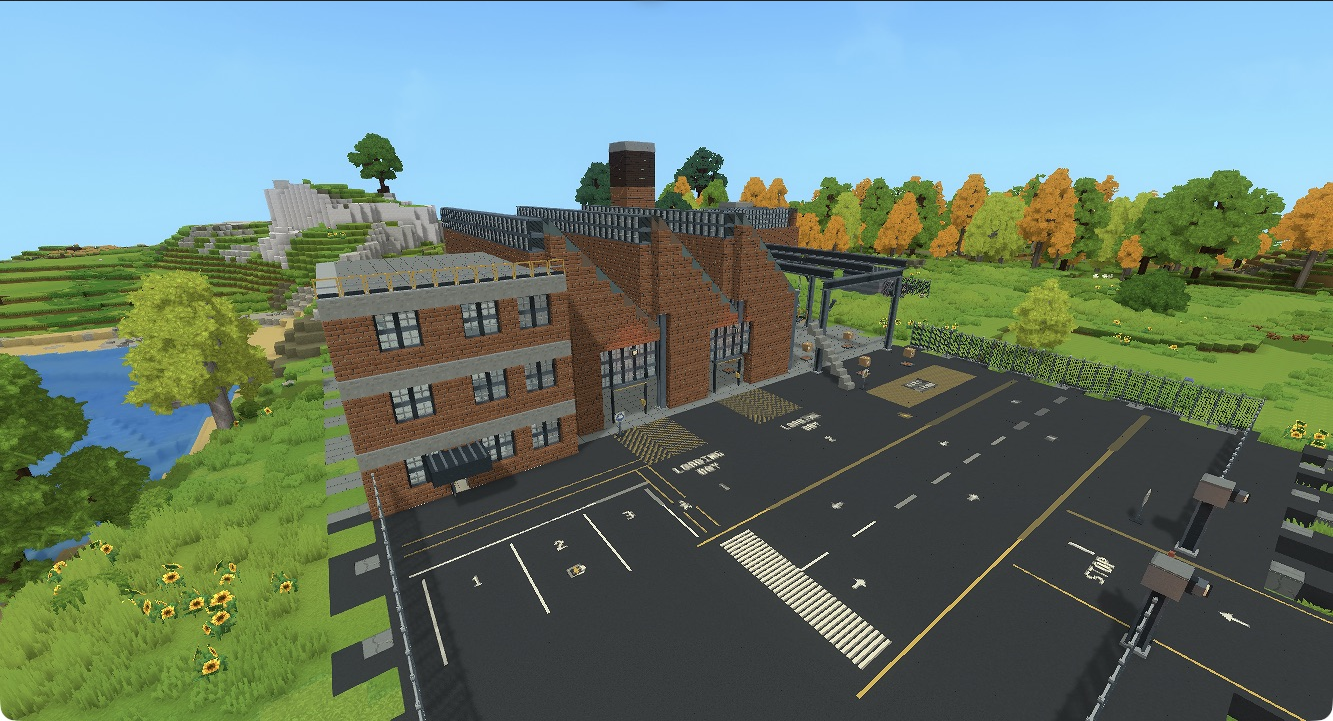
Three repeating sawtooth roof bays cover one main hall. A separate office tower gives the front a recognisable silhouette; the open steel gantry creates a second working area beside it. Reuse brick, glazing, steel columns, crossbeams and the roof kit across the complex. Give the entrance and loading doors enough room for their real movement.
Keep the first floor level, choose ground with a modest grade and use a shallow soil skirt around the outside. Break up the outer paving and leave patches of local grass. The showcase uses a deliberately chosen site; it does not change existing generated factories or automatically landscape player builds.
A readable freight court
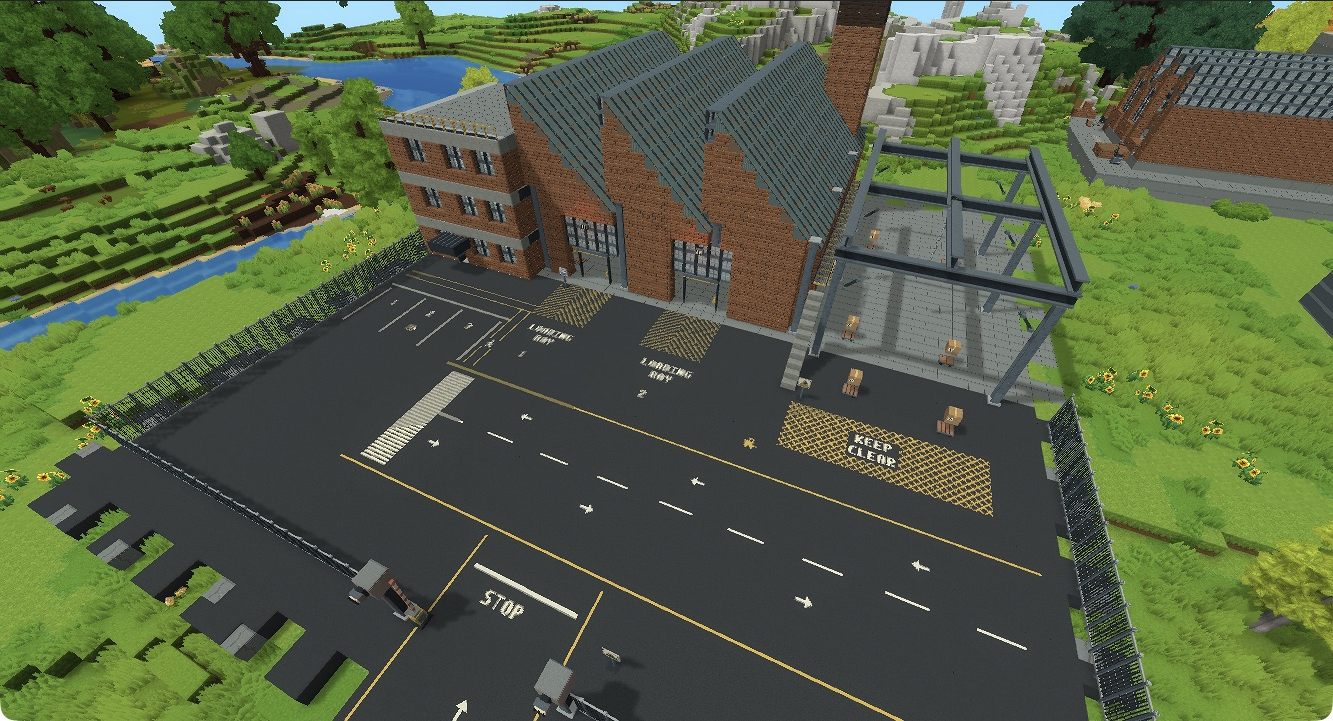
Lay out the traffic route before adding markings. This court uses opposing arrows and a white broken centre line, with continuous yellow boundaries. The loading areas have diagonal hatching and complete LOADING BAY stencils. The gantry service area has crosshatching and KEEP CLEAR lettering.
Leave the marked exclusion areas open. Put cargo pallets beside the lanes, keeping a clear line between the gate and the loading doors.
Parking and pedestrian access
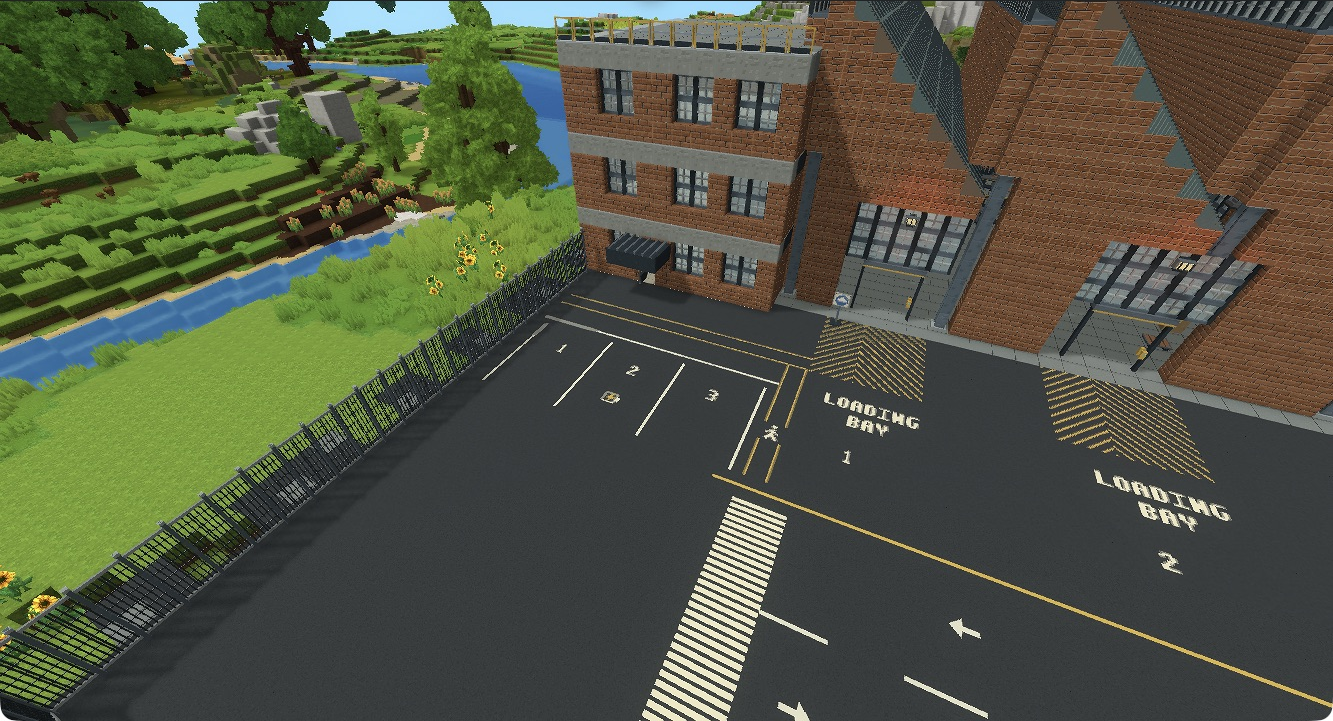
Use white dividers and bay numbers to turn a blank yard into a small parking area. Lead a yellow-edged walking route toward the office and carry the zebra crossing across the vehicle lane. Direction symbols should agree with the lanes they belong to.
With the expanded kit, right click with the Tarmac Paint Brush to choose a marking. Close its palette, press the normal building rotation key (R by default) and check the preview before left clicking to paint. Place full factory tarmac beneath the whole stencil: STOP needs 3×1 blocks, KEEP CLEAR needs 3×2 and LOADING BAY needs 4×2. Painting spends one durability per tile that changes; a refused stamp leaves the road unchanged.
These constructed layouts demonstrate existing marking states. They do not establish survival acquisition or multiplayer acceptance.
Inside the hall
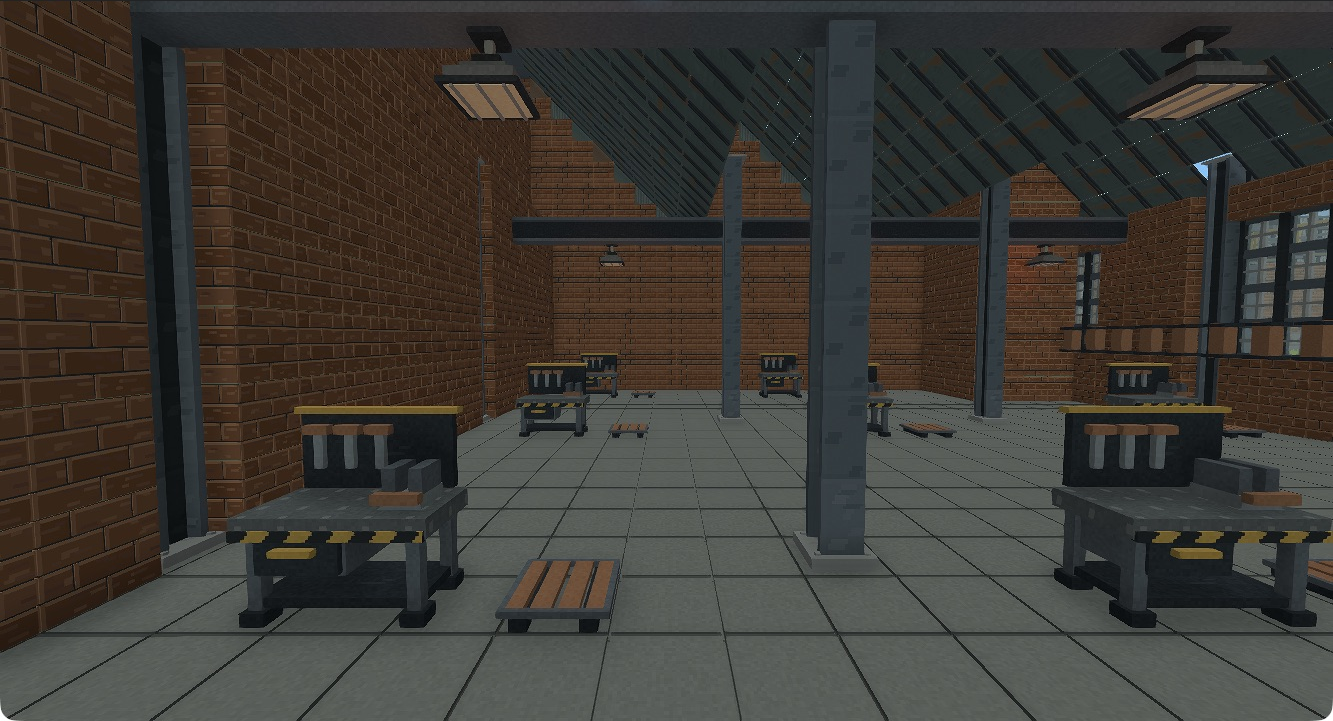
Keep a continuous central aisle between work areas. Give wide workbenches neighbouring floor cells and clear headroom. Overhead crossbeams, catwalks, guarded lamps and utility ducts add useful layers without filling the walking space. The ducts are architectural props; they do not transport fluids or power.
For the basic crafting route, see first steps and the Foundry Workbench.