Yard, cargo and road markings
Yard, cargo and road markings
The expanded yard kit adds cartons, connected cables and fencing, safety signs, rotary beacons, an entrance barrier and painted tarmac. Check your selected file’s notes for included content. Native development checks covered Hytale 0.7.4 and 0.7.5; new-content listening, wider survival use and real second-client checks remain open.
Cartons and pallets
Craft Small shipping carton, Medium shipping carton or Large shipping carton from Plant Fibre at the Foundry Workbench. They are decorative, with no storage inventory. Use right click to place a carton on ordinary supported ground. A green outline shows its intended position. Large cartons support grid-height stacking.
To load a Steel cargo pallet, hold the carton, aim at the pallet and right click. The outline follows the actual pallet deck or current stack. One carton is consumed only when mounting succeeds. Up to three cartons of mixed sizes fit on a pallet; their bottoms follow the actual deck and the previous carton. Clear the entire stack space first. The pallet owner dismantles the complete stack and recovers every carton along with the pallet.
Tarmac Paint Brush
Craft Factory tarmac from Rubble and Charcoal and place a road at least one block thick. Craft the brush from 2 Iron Ingots + 4 Plant Fibre + 2 Sticks. A fresh brush has 256 durability. Painting or erasing costs 1 durability per changed tile; unchanged tiles and refused actions cost nothing. Large stamps require enough durability for the whole operation. The brush is marked repairable for the native repair system; the complete repair-kit playthrough remains unverified. You can craft a replacement when worn out.
| Action | Result |
|---|---|
| Right click with the brush | Open the native marking palette |
| Choose a pattern tile | Save that pattern on the held brush |
| Building rotation control (default R), with the palette closed | Rotate the native world preview by a quarter turn |
| Erase | Toggle removal of paint |
| World preview | Toggle the non-destructive marking preview |
| Left click on tarmac | Apply the selected paint or erase action |
Pattern, erase and preview settings travel with the brush. Close the palette, aim at the top of the road and use your normal building rotation control (default R) to turn the native placement preview. Left click applies the angle shown. The preview is local to the player; rotation follows the client’s normal building placement state. Every tile under the stamp must be loaded, registered factory tarmac within eight blocks, with clear space above. One click paints the entire stamp or leaves the road unchanged. Erase clears one tile at a time. Repainting changes its saved state and top appearance; the road remains a full solid block and drops tarmac when removed.
Choose straight, left or right arrows; solid or dashed white/yellow centre lines; white/yellow corners and junctions; or a stop bar. Lines reach the cell edges so matching neighbours align.
The palette has 45 choices in six tabs. Browse tabs and pages without changing the selected marking; click a swatch to select it.
| Tab | Markings |
|---|---|
| Lines | Single, dashed, double and solid/dashed white/yellow lines; corners, junctions and stop bar |
| Arrows | Straight, left, right, straight/left, straight/right, left/right and U-turn |
| Bays | Bay end caps, dividers and numbers 1–9 |
| Crossings | Modular zebra stripes and yellow walkway boundaries |
| Safety | Diagonal hatching, crosshatching, hazard edges/corners, forklift, pedestrian, no-entry and charging symbols |
| Stencils | STOP 3×1, KEEP CLEAR 3×2, LOADING BAY 4×2 blocks |
Place neighbouring stripes, boundaries and bay pieces to build larger layouts. Rotate hazard corners and paired lines with R. Text stencils preview their complete footprint and paint as one action. All options use the same brush and recipe. Multi-block stamps spend durability only on tiles that change.
Perimeter and entrance
Place Tall factory perimeter fence anchors along cardinal directions. The three-block-high posts and welded mesh join at straight runs and corners. Give the Rising factory entrance barrier four blocks of clear width and height around its pole arc. The attached pole pivots upward from its pedestal when opened.
Anyone within eight blocks may use the entrance barrier or a red, amber or green rotary beacon. The barrier checks its movement volume before starting; obstruction refuses the action. Beacons rotate their reflector and emit light only while On. A coloured moving point light follows the rotating lens sector; the engine’s point-light API does not provide a true shadow-casting spotlight. The visible shield cannot cast a moving light shadow. They have no continuous alarm. Saved states survive a normal reload. The placing owner keeps dismantling rights.
Elevators remain deferred. These decorative yard fittings do not add electricity, vehicles or automatic machine-network control.
Walls, channels and cables
Service channel floor connects into ends, corners, tees and crossings. Bolted I-section columns connect vertically, keeping the foot and cap on the outside of the stack. The reinforced service wall has a recessed louvred hatch and attached copper conduit; kiln brickwork has four staggered courses and recessed mortar.
Attach Dangling ceiling cable or Ceiling cable bundle below a solid ceiling, then place further sections directly underneath to extend the drop. Keep walking and head space clear. These are decorative cables and carry no power.
An existing two-block fence under a low ceiling keeps its old height until the third cell is cleared. New fences require three blocks of clear height.
Safety signs
Choose electrical hazard, hot surface, moving machinery or mandatory helmet signs at the Foundry Workbench. Each has a wall plate and floor-post version. Wall plates need a solid wall behind them; posts need a supported floor and room above. Rotate wall signs with R before placement. These signs provide visual guidance and do not prevent damage.
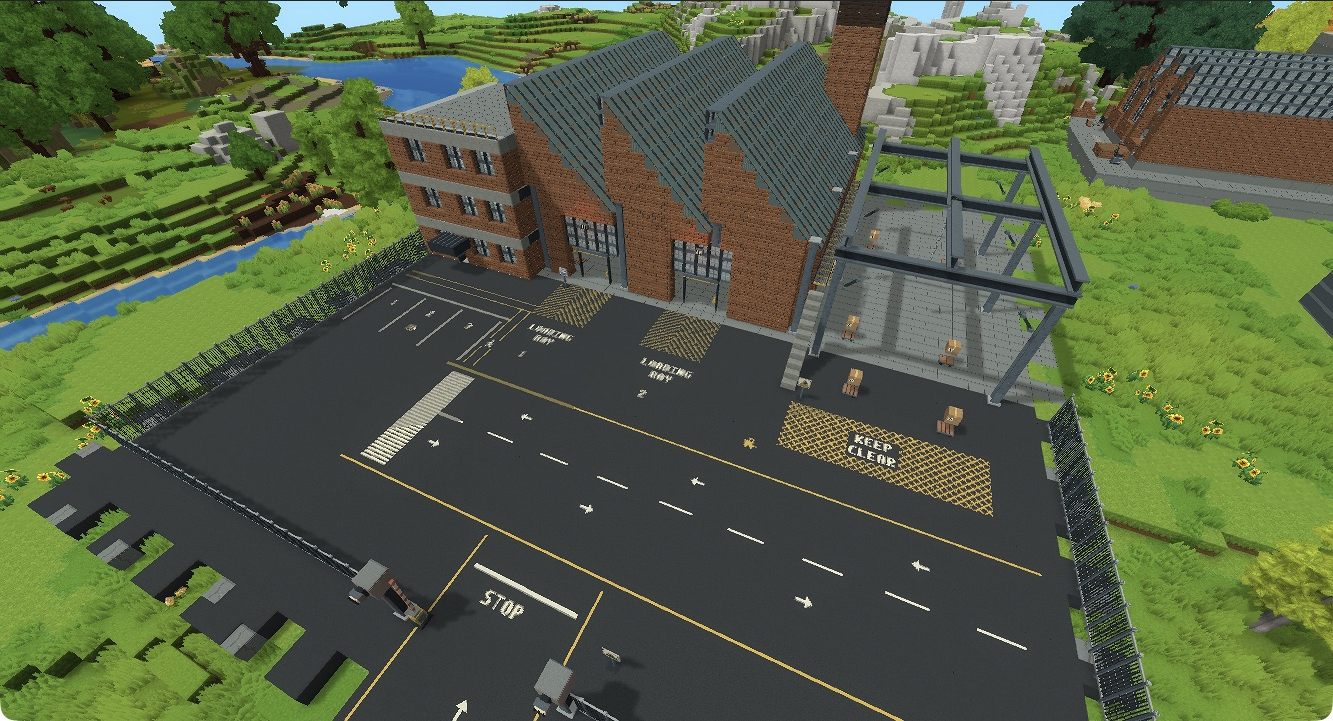
See the factory and road-layout showcase for larger layouts.